
Zander Fishing · Prey and Lure Path
Why Do Wary Zander Follow a Soft Plastic Lure—and What Should You Change First?
Are Zander Really Wary—or Is the Lure Simply in the Wrong Place?
It's easy to say, “The zander was wary.” On the water, that statement is useful only if it leads to a testable question: What reason would a zander have to notice and take my lure in this spot? A fish may be full, outside your casting line, pursuing different prey, or seeing the lure for only a moment. Simply switching to a new soft plastic does not automatically solve any of these possibilities.
That is why the fischfindertest principle comes first: understand the prey, structure, and zander zone, then choose the presentation. For example, if you suspect a channel beside a school of baitfish, your lure needs a controlled path along that edge. A perfect shad that lands far below the prey layer on every cast cannot convince a wary fish.
What Prey Should Your Soft Plastic Imitate in Your Local Water?
The old article makes an important point: prey varies by region. Smelt may play a central role in the Elbe. In a lake, however, bleak, roach, perch, ruffe, or young coarse fish in that particular area may be more plausible. Crayfish and other bottom-dwelling food may also play a role. The name on the package does not decide; what matters is what the zander can actually reach today.
Before your first cast, look closely: What small fish do you see at the surface or in the harbor? What silhouette appears on the fish finder? Are there signs of fry, crayfish, or hunting perch? A slender shad may suggest a small bleak or smelt; a deeper body may resemble a perch or roach. This is not a photocopy of nature but a plausible hypothesis that you test on the water.
Prey percentages from individual studies or waters cannot be turned into a fixed list for all of Germany. Use them to ask better questions: What food is abundant here? What food is easy to reach? Where does it meet an edge or calm area? Those answers determine a sensible lure path.
What Lure Size Makes Sense for Wary Zander?
The previous article recommended larger soft plastics in winter and smaller ones in summer. As a rough observation, that may fit some waters, but it is too simplistic as a rule. A winter zander does not automatically eat a 20-centimeter lure, and a summer zander does not have to prefer a small shad. If large prey are available at the appropriate depth, a large lure may be plausible. If small juvenile fish or a thin prey layer predominate, a compact lure is often the better first choice.
Also consider how size affects your presentation. A larger soft plastic usually displaces more water and may sink differently with the same weight. A smaller lure can often be worked more delicately along an edge or over the bottom. The question is not only, “How large should the lure look?” but also: How long can I keep it at the suspected strike depth?
How Much Action Does a Reluctant Zander Need?
A paddle tail produces pronounced movement and pressure waves. A slender, subtly moving soft plastic may appear more credible in clear water or when fish are less active. But this is not a fixed rule either: turbidity, current, and prey activity affect how much movement a zander perceives and how well you can control the lure.
Therefore, change only one variable at a time. If you switch from an aggressively worked shad to a small, dark lure with a different shape and weight, a subsequent bite will not tell you what worked. Better: same spot, same depth, lower hops. Then same spot, same retrieve, different contrast. This turns “only X worked today” into a repeatable observation.
What Retrieve Gives a Zander More Time to Decide?
Dragging and jigging cover water. That is useful when you still need to locate the zander zone. But along a distinct edge, near a single fish-finder return, or after a tentative contact, a soft plastic may leave the fish's viewing window too quickly. That is where gentle lifting comes in: raise the rod tip only enough to lift the lure off the bottom, take up the slack, and let it sink back into the same zone.
With gentle lifts, the lure moves forward only a short distance and remains closer to the area you consider likely. The method is not a magic trick, and it will not catch zander in the wrong place. But it provides a controlled way to test less commotion and more dwell time in a well-founded spot. A detailed comparison of dragging, jigging, and gentle lifting is available in the article on zander lure presentation.
When Should You Change Color and Contrast?
In murky water, silhouette, contrast, and pressure waves may matter more than subtle patterns. In clear water, a subtler, more natural-looking lure may make sense. At night, a clearly visible silhouette is often more important than an exact color detail. Which color is “better” therefore also depends on visibility, depth, and ambient light.
A practical sequence: Start with a lure whose size and shape match the prey. Once you control the right depth and retrieve, test stronger or subtler contrast. Only then address color. This saves time and prevents an empty spot from looking like a color problem. More about visibility, contrast, and pressure waves will be available in Lure Knowledge (German-language edition; English edition coming soon) once the product page has been created.
What Does the Video from the Previous Article Show?
The video is part of the existing WordPress article and has therefore been retained here. Use it as a visual reference: shape, action, and presentation are easier to assess when shown in the water. Applying it to your water still requires a decision: What prey, depth, and lure path are plausible there?
What Sequence Prevents Aimless Lure Switching?
- Justify the zone: Read the prey, edge, bottom, current, and light.
- Choose the prey: Select a size and silhouette that suit the water.
- Control the depth: Deliberately check sink time, bottom contact, or the prey layer.
- Change the path: Adjust the casting angle and retrieve so the lure remains in the target zone longer.
- Reduce or increase the action: Test speed and hop height first, then lure shape.
- Test contrast: Try different visibility while keeping the zone and retrieve unchanged.
- Record it: Note the location, time, water conditions, lure path, and contact—even without a fish.
Wary zander are therefore not an excuse for endlessly cycling through lures. They are a reason to be more precise: What should my lure represent here, where should it travel, and how long will it remain visible? Anyone who can answer these three questions will make a better decision on the next cast—even if the bite does not come immediately.
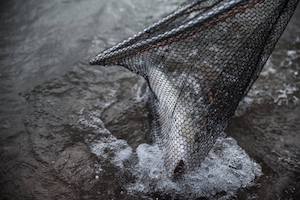
Sources and retained material: This article expands on the previous WordPress post, “Wary Zander—How Do Soft Plastic Lures Work?” The original photo and existing Vimeo video were retained. Its content has been supplemented with Modern Fish Finding—The Zander and Lure Knowledge regarding prey, lure path, visibility, contrast, and gentle lifting. Statements about prey and lures are decision-making aids that depend on the water and situation, not blanket promises of catches.